Showing posts with label Celebrations&Seasons. Show all posts

09 April 2017

Creative Guide to Gift Giving

Hello everyone! Sorry that it's been more than two weeks since I last posted but I'm back with something a little different. Today I wanted to share with you something that I enjoy doing every now and then, being creative with gift giving. There have been several friends that have had birthdays in the last two months so I have lots of ideas for you.
This first set of gifts has a bit of a theme. I tried to use lots of pastel colours and a few metallics so the gifts would tie in well together. I handmade some bookmarks that looked like some of my friend's favourite cartoon characters. One of my tips for gift giving is to make some gifts yourself. This means that you can really personalise the gifts and it's fun to see what you can create.

This next set of gifts doesn't really have a theme but there's a few fun gifts here. My next tip for gift giving is to ask a few questions to the person you're giving gifts to. A few weeks before their birthdays, I asked my friends a few things about what their favourite things are. Things like their: favourite sweets, favourite TV shows/programs, favourite accessories and things that they can't get enough of/collect. This helped to inspire me with possible themes or just the sort of gifts they might like. In the jewellery box in the photo, are some handmade earrings. This friend told me they liked Harry Potter and Stranger Things and their favourite accessories were earrings. So I made waffle stud earrings (apparently waffles are a Stranger Things reference) and golden snitch inspired dangly earrings (a Harry Potter reference).

Again, this next set of gifts doesn't have a theme but I used the questions about their favourite things to come up with these gifts. My next tip for gift giving is to try to give different types of presents. What I mean by this is you should try not to give just food or just jewellery or just stationery, etc but instead to give a mix of all of these things. The reason I say this is because everything lasts for different amount of times. Food lasts for a very short amount of time, depending on how tasty it is tee-hee. Stationery lasts for much longer but can eventually be used up. Then jewellery could last for a very long time. BY the way the handmade items here are: the notebook, the bookmarks and the earrings inside the jewellery box. 


 This final set of gifts does have a theme, jaffa cakes. It's a bit of an unusual theme but fun. That's why my last tip is to think outside of the box. Just think, who else is going to give these gifts? I don't think anyone else would (that could either be a good or bad thing, you decide hehe). I used two of the things that they said were their favourite things: jaffa cakes and bath bombs, to inspire me. This was actually quite difficult to put together because there weren't many jaffa cake items in the shops. So I actually bought chocolate orange items from the shops:chocolate orange bath bomb and chocolate orange lollipops. I made the notebook myself and the keyring was handmade too, but not by me. It was made by Heartfelty (see their facebook page here).

I hope that I've inspired you to get creative with your gift giving, it's such a fun thing to do for your friends and family! Just to recap, here's my four tips for creative giftgiving:

  1. Hand make some gifts-this can really personalise the gifts
  2. Ask the recipient a few questions about their favourite things-again this helps you to personalise their gifts
  3. Try to give a few different types of gifts-this means the recipient can enjoy their gifts in different ways for different amounts of time
  4. Think outside the box-this makes the gifts fun and unique
So that's all for today's post, remember you don't have to spend a lot of money to give gifts that your friends will enjoy, I just thought I'd share a few creative ideas to inspire you.

Over to you..
Have you given any gifts recently? Or have you been doing anything else creative? Let me know in the comments. Also, what has been your best gift you've ever received?

02 January 2017

2017 Blogging Resolutions

Happy new year! For my first blog post of 2017, I thought I would tell you a few of the changes I hope to make to my blog in this coming year. I'm only making a few small changes, I think you'll still enjoy reading my blog if you've been reading for a while. I'm excited to introduce a few new ideas and see where my blog takes me in this new year! I think that my blog really grew last year as because I tried out a few new topics such as penpalling and colouring that I have become very passionate about recently. I hope that my blog improves even more this year and I continue to try out new ideas.

The first change that I decided to make this year is a change in my schedule. I've decided to aim to post about once every 2 weeks rather than once per week. I've found that I tend to post once every 2 weeks anyway so I thought that I'd announce it as an actual change. It's quite hard for me to fit in blogging with school and I'll be getting more schoolwork in these next two years so I wanted a bit more time to write posts. I don't think you'll notice much of a change anyway since I didn't really stick to the once a week schedule anyway.

I have done one blog collaboration in the past and really enjoyed it so I thought that this year I would take part in a few more collabs. Last year I started to work on a Disney fanart collab with 5starartists.blogspot.co.uk which I'll be able to continue this year now that I have finished the colouring challenge. Also, I hope to start some more blog collabs with my blogging friends that we've been talking about for quite a while. A project that I was working on last year was guest blogging for Cathy Cassidy's blog which I hoep to carry on with this year.
I'm really excited for my next change in this list! In the upcoming months, I'll be introducing some new topics that you've never seen me write about before! For Christmas I asked for a bullet journal and bullet journal so I was given both of these. I've never tried out calligraphy or bullet journalling but I'm really looking forward to trying them out. I want to share my experience with you so you can see what it's like so you might want to take up the hobbies yourself! I think learning new skills is a great new year's resolution so I hope to inspire readers.

I feel that in the previous year I haven't done much fashion designing at all. I feel like this is a big shame since it is something that I'm very passionate about, in fact I have always thought that fashion design is a career that I want to get into in the future. There's still lots for me to learn so that's why I want to get back to this topic on my blog. I think that having a blog motivates me to try creative things so I'm hoping that now I have said that I want to write about fashion design, I actually will DO fashion designing. I created a fashion sketchbook that I want to use.

The final change is one that is the most difficult to achieve. I will try my best to make at least a little progress on this during 2017 but I can't promise anything. The reason that I am unsure about this goal is because I will be getting more schoolwork in the next two years. This means that I will be more busy. However, I setup a YouTube channel last year that I want to upload more videos on. I don't think that I will use a schedule yet but I do want to be a bit more active. I have filmed a few videos but they're not edited yet and are quite old. so fingers crossed that I will have time for YouTube but I may not.

So those are the five changes that I aim to make in 2017! I hope that you're happy with the changes I want to make, I don't think there are any dramatic changes so you don't have to worry that my blog is going to transform into a completely different creature. I'm sticking with creative topics as I always have done and I'm excited to see the blog evolve to fit my newest hobbies as well as my original ones! Happy new year everyone!

Over to you...
What are your new year's resolutions? I have quite a few that I'll be tracking in my bullet journal. Also, are there any blog posts that you'd like to see in the new year that fit with the creative topics that I already write about/plan to write about? Let me know in the comments.

PS: I'll make a new blog background very soon but you'll have to look at the Christmas one for a little while longer ha-ha!

20 December 2016

Why I'm Doing a Month-Long Colouring Challenge

During October I did a month long art challenge called Inktober which really helped me to improve my inking skills so this December I decided to do something similar. I decided to do a month long colouring challenge where I aim to colour in a whole colouring book before Christmas Day. It's proved to be very difficult but I think that I'm really benefiting from the challenge so I thought I'd share the idea with you in this post.
The reason I thought of this idea was because I saw the colouring book called 'Colour Yourself Advent Christmas Countdown' that was drawn by Heartfelt Illustrations (see the Facebook profile on this link). The book inspired me because it seemed that there was a page for every day of the month so I decided to colour one page every day. Unfortunately December is a very busy month so I haven't done one page per day but have tried my best to get close to that target. I used my Prismacolour pencils and gel pens o colour all of the pages and it's been really useful for me. This page was for the 1st of Decemeber and was a snowman. I learnt a lot from this first page because looking back I can see that I went a little overboard on the snowflake details so on future pages I didn't draw anything onto the backgrounds.

 One of the main things that I have improved on during this challenge is blending without blending tools. Normally, I would sue a colourless blender pencil or a blending stump to help me to create a smooth gradient. However, during this challenge I decided not to use any blending tools. This has meant that each page takes about double the time than usual, but now I have really improved my blending skills. I've found lots of ways to blend properly now such as: using a white pencil, using varied pressure on my pencils, building up tone gradually, etc. I struggled on the first few days to go without blending tools but after a while it got easier.
 By the time I coloured page five, I had got very behind on the daily schedule. I had to start catching up with colouring fast. I'm still actually behind by nine pages. I think that doing colouring almost every day has helped me with my working speed. I struggle with time management so I try my best to do organisation and time limits, etc but doing month-long challenges has proved to be the most effective method to help me with time management. I've never produced more art or colouring than during Inktober and the colouring challenge this month,


Another reason that I've done this challenge is not only to improve my colouring, but for fun too. I love Christmas so a Christmas themed colouring book is perfect for me. Colouring in festive art every day is great because it gets me excited for Christmas. There's only 5 days until Christmas now! Can you believe it? Christmas is my favourite time of year so I try my best to make it last. I love chocolate advent calendars but this colouring one is really unique. It's been great counting down the days until Christmas with this because it's something a little different and keeps me busy all the time. I've only shown you photos of some of the pages but half of them have activities on them which inspire me.


 I'm looking forward to next December too because I can display my advent calendar once it's finished. This year I haven't displayed it because I would have had to take it up and down to switch between colouring and displaying it. I think it's great that with this book you can use it as a colouring book and a calendar because I can look back next year and see how my colour application has changed. Maybe I'll even colour another one next year to compare them-who knows? It's nice to look back on old art or colouring or anything because it shows that with practise I can improve my skills and techniques. It keeps me motivated to carry on even if I aren't happy with my current skill. If you're an artist,colourer(I'm not sure what it's called),etc  then I recommend that you look back at old art or colouring to keep you going.

 Overall this challenge has been difficult but worth it. Every time I do a month-long challenge, it's very tiring for me but when reflecting back on it I feel proud of what I've achieved. I know that some people just think colouring is a hobby, but for me colouring helps me to improve colour application for my own art. That's why I feel like doing this challenge is a real achievement because I'll be able to see a difference in my own art next year. Hopefully next time I do a month-long challenge I'll have time to do it every day as planned. Maybe it would be wise not to choose December for my month-long challenge next time! It's a busy time of year so doing this has been a little stressful. I've loved building up the colouring book though and seeing what I can do when I really push myself. I hope that I've inspired you to do a month-long challenge whether you use an official one like Inktober or come up with your own like I have this month!

That's all for this week's post. Sorry that I missed last week but as you can see from this post I've been very busy recently. I've noticed that although I set a schedule of posting every week, I keep missing a post. Therefore, I think that in the new year I might make a few changes to the schedule and my blog so that it's less stressful for me. Anyway, I hope you enjoyed seeing my colouring pages and hearing about this challenge.

Over to you...
Have you ever done a month-long challenge? Tell me about it in the comments. Do you enjoy colouring, any tips? Also, what are you doing for Christmas? I'd love to know.


05 December 2016

Christmas Card Craft Idea

Hello everyone! I'm finally back with another post and it's my first Christmas one!I've had lots of revision to do recently so I took a few weeks away from blogging but I missed it so I'm back this week. Today I've got a lovely Christmas card idea for you to craft for your friends and family so get cosy and see how I made a wreath card!

 Firstly I chose a Christmas patterned paper, a plain card, a bow, a doily and a few Christmas washi tapes. You can find all these supplies (or similar ones) at The Works or The Range. These are two of my favourite shops for craft supplies since they sell a wide range of products for good prices. In ended up not using the button you can see in the photo or all of the washi tape but you might decide you want to. As yopuc an see I have quite the collection of Chrsitmas-y washi tapes-I've been collecting lots in the last few months!
 Now that you've got the basic supplies you can now choose all of the embellishments. You'll use these to decorate the wreath so you'll want small, festive embellishments. The ones you can see in the picture are: silver star stickers, enamel dots, crystal stickers, a range of Christmas stickers and Christmas phrase stickers. You probably won't sue them all on one wreath but I just got out plenty of embellishments so I could choose what looked best. I actually went with the crystal stickers, stars and mini candy cane stickers for the wreath. I also used a Christmas phrase sticker elsewhere on the card. I liked how the red crystal stickers looked like berries, the yellow crystal stickers looked like flowers and the green crystal stickers looked like sprigs or leaves. The enamel dots would have given the same effect but I wanted to give a sparkly effect to the card! By the way, some of these products were from a subscription box last month called Birmbles Box.
Here's the final result! started by cutting a strip of patterned paper and glueing it n the left side of the card as an accent. Originally, I was going to make a background with it but I think it would have been too overpowering. I cut the middle of the green doily out so that it looked like a wreath. Once you've glued down the patterned paper and green doily you can personalise it however you want! This is where the embellishments come in! I spread out the crystal stickers, stars and candy canes evenly around the wreath. After decorating the wreath, I created the ribbon. In chose a washi tape and cut a small section of it to go above the wreath, To give the impression of a real wrath, I then put a bow on top of the washi tape. I used double sided sticky tape for this. To finish off, I used washi tape and a phrase stcker in the centre.

There you go, that's how I made the wreath Christmas card and I love how it turned out! It's such a unique card; I thought of it when I was looking at my Christmas craft supplies, I knew I wanted to use a doily but I didn't want to just stick it down so I did this instead! So now you're ready to make your own Christmas cards, let me know if you make any.

PS: I've changed the background for Christmas now. Do you like it? I created it with the PicMonkey overlays, sorry that I didn't draw any of the elements this time round. Hopefully my next background will have some of my drawings.

Over to you...
Have you made this card idea or any other Christmas cards this year? Tell me about it in the comments. Also, do you have any Christmas blog post ideas? I'm looking forward to writing plenty of Christmas posts!

25 October 2016

Coraline Costume Design 2016


 Hi everyone! Halloween is just around the corner now, so that's why I've decided to share my costume design for this year! If you don't know what you're going to be for Halloween, this will give you an idea! I love to watch the film 'Coraline' at Halloween so this year I decided to dress up as her. I've got a few pieces that I'm planning on wearing but I wanted to picture how I was going to wear them, that's why I drew out my design!

Here is my costume design for this year! I started by drawing it out in the pencil and then used my stabilo coloured fineliners to go over the liners and colour it in! Normally, I would just use my Prismacolour coloured pencils for something like this but I wanted to use this as my Inktober drawing yesterday so I used fineliners! I know that the anatomy isn't very accurate (especially on the legs) but this was just to give me an idea of what my costume will look like when I wear it! I don't always draw a costume design every year but it's helpful to look back on when you're getting ready so you can check if you've got everything on! For example, I might forget to draw freckles on my cheeks but when I look at this I'll know where I made a mistake! There's some parts of this design that I haven't got yet: the fimo clay rock/sweet and the dragonfly clip are yet to be made. Also, I don't think I'll wear the yellow wellies because a.I don't have any and b. I'm wearing this for an indoor party.

As well as the costume design, I wanted to show you a few elements of my outfit in this post! Here's the handmade Coraline doll that I talked about in a previous post. If you want to know how I made it, go to the post from two weeks ago by clicking here. It was based on the doll in the film that Coraline's neighbour/friend Wybe gave to her. Wybe found the doll in his Grandma's house, she wasn't too happy that he gave it to Coraline (you'll find out why if you watch the film which I highly recommend)! It isn't an exact copy of the doll that is in the film but it has a similar style. The doll is quite an important part of the story so that's why I chose to make this as part of my costume. However, you don't have to make or buy one to make your outfit a good representation of Coraline.
The last thing I wanted to show you in this post is the yellow anorak that I'm wearing on Halloween! I was surprised when my Mum said she had found i in a charity shop for me because I was worried that I wouldn't find one in time for Halloween! If you're looking for a cheap costume then I recommend that you look in charity shops for the items that you need! It wasn't in the first charity shop that was looked in though, apparently it was found in about the 7th one! So don't think it's an easy task to find the perfect costume for a small price! But putting together your outfit is half the fun! It's great to see it come together piece by piece until you've got the whole costume! The good thing about Coraline's outfit is that everything looks ordinary. This means that I can wear things like the raincoat again. By the way, Coraline wears other outfits in the film such as the starry jumper so there are several options!

I hope that this post has inspired you to choose a fun Halloween costume! I'm looking forward to Halloween, I'll make sure I have a picture of me in the costume to share with you! Come back next week to see my last Halloween post which will be about what I did (will do) on Halloween!

PS: My first blogging tips post was published on Cathy Cassidy's blog (Dreamcatcher) a while ago. Click here to see it! I'm working on a second one now as well!

Over to you...
What are your plans for Halloween, are you dressing up and going to a party, staying at home to watch scary movies or something else? Also, what are your Halloween movie recommendations? I'm also looking for new ones! Let me know in the comments! 

17 October 2016

Why I'm Doing Inktober!

 Hello everyone! Inktober is a month long drawing challenge where you draw one ink drawing for every day of October. Some people don't draw absolutely every day, but I try my best to draw every day (I think I've only missed one day so far). You can draw whatever you want as long as it's in ink! There are some prompts that you can find on social media but I just draw what I feel like each day! Most of the things I draw are Halloween or Autumn themed because this season is so inspiring-don't you think? Gorgeous colours, a gentle breeze and that fresh start feeling!

So, why am I doing Inktober? I am doing Inktober for many reasons. Firstly, it is an interesting challenge to post on social media! I recently got Instagram so doing Inktober is a great excuse to post every day ha-ha! I love creating new, creative content for my Instagram and this blog! Any excuse to draw every day is good enough for me! I feel like I am on a roll at the moment in terms of art, I just started my GCSE art course and it feels like I am drawing every spare minute! I'm loving it though! Taking my art sketchbook home is fun to develop my school work and then I draw my Inktober things to create a personal sketchbook! Unfortunately focusing on drawing means that I am doing less of other things such as: fashion design. Sorry that I haven't posted a fashion design post for a while but I will try in November once the challenge is over!


Another reason I am doing Inktober is to build up a 'stash' of drawings that I can then edit! An example of my edited ink drawings is on the right! Here's an edited version of the owl ink drawing I showed you above! I started by scanning it and then taking it to Photoshop where I cleaned up the lines, removed the white background and coloured it in. I then saved it as a png. I then went to PicMonkey (an editing website) on the design feature where I made a background and then added the owl as an overlay. I like to take my ink drawings into digital art because it progresses the simple drawings into professional-looking art. I then use these as Inktober posts (which is cheating but oh well)!xD

The main reason I am taking part in Inktober is to improve my inking skills. I don't think that 'inking' is my strength in art so doing Inktober has helped a lot. In my art course, you get higher marks for experimenting (using different mediums, techniques, etc) so using ink is a skill I need to be skilled at. I do think that doing Inktober has been an effective way of developing my skills with biros and fineliners. You can see that this drawing on the left is much more comlex and 'better' (I mean more detailed) than the owl drawing at the top. This is actually my favourite drawing so far. This was my first time experimenting with the cross-hatching technique and I think it worked well! It took me a long time (until I thought of putting this in the bin) but you have to put time in to see improvement! You can clearly see the development so I think this has been a useful challenge!

The last reason I am doing Inktober is so I can improve my blog! You will have seen my new Halloween background that will be here for October. This was actually made with the skull drawing I showed you above! I have decided to make all my blog backgrounds since the pineapple one I had last month, by myself! This will improve my blog by making it unique to me! Another way Inktober will improve my blog is because it has helped me get used to drawing often! This means that I will be able to produce art faster in the future so I can post my art more often on here (remember I am aiming to post every week)! I am enjoying improving my blog content, I wonder how it will have changed this time next year? It's these sorts of wonderings (this isn't a word is it) that make me look forward to the future!

I hope you enjoyed this post full of my Inktober art! I recommend that you do any daily art challenge (it doesn't have to be Inktober) because it gives you the results that you want and sparks your creativity!

Over to you...
Have you ever done an art challenge such as Inktober? How did it go? Let me know in the comments! If not, would you ever try it? 

11 October 2016

Craft Project Idea:Coraline Doll

 I love celebrating Halloween (and all celebrations really) and I love crafting so I thought I would combine the two in this week's post! This week, I have been making a doll from the Coraline film using felt! I'll be using this as part of my Halloween costume this year, which as you can probably guess, will be a Coraline outfit! Coraline is one of my favourite Halloween films because it perfectly mixes creepy with cute and the animation style is beautifully stunning! Hopefully this will give you a few ideas for your next project, it's not necessarily a tutorial but i'll tell you the basic steps I took to make Coraline!

To start making this doll, I decorated her face! I chose two shiny,black buttons for her eyes and sewed them in place. Next, I drew on the felt where I wanted the lips, eyebrows and freckles to be. You can draw quite easily with biro to give you an idea where to sew! Then I started to sew the rest of the facial features! I used satin stitch for her eyebrows, french knots for her freckles (which are quite complex stitches, so I recommend you practice them on a fabric scrap first) and I haven't sewed the lips in this photo yet! I then created two hair pieces out of blue felt! I started by cutting out a basic hair outline for the front and back and then cut strips of felt, which were then sewed onto this larger piece! This helped to add texture to the doll which adds interest!


In this next picture, I have started to add clothes and sew her lips on. For the lips, I used basic running stitch down the centre (in brown thread) and then filled above and below the line (in light pink thread) in whatever way I could. i'm not sure if the technique I used has a name but I just imagined the thread was a pen and I was colouring in the lips. If you're confused, I mean that I simply put my needle through at the top and put it back at the bottom, then moved along to the right and went through at the bottom and then out at the top, and then repeated until it was done. Sorry if you don't understand, it's hard to explain! I then sewed on a dark pink vest which I then sewed light pink strips onto with running stitch that was spaced apart. I then put a black strip to be the skirt waistband (I put the skirt on in a later picture). After this I sewed on white socks which has black stripes sewn on. Finally I made yellow boots with laces!
In this photo, you can see Coraline stuffed! She was sewn up using blanket stitch in a skin tone. As I stitched, I added little bits of stuffing to make sure I didn't miss any gaps. I probably would have missed gaps if it was stuffed after sewing most of it up. It can be fiddly to sew and stuff simultaneously but this method is the most effective to evenly stuff. Take your time to sew it up because you don't want to leave large paces between each stitch because the doll will easily fall apart and the stuffing will come out; you don't want that!  I forgot to mention earlier, I added a little clip in Coraline's hair that she has in the film. If you add all these little details, it makes for a more accurate costume (but if you're short of time, you can just create an impression of Coraline rather than a close replica).


This last photo shows Coraline now that she is completely finished! The things that changed from the last picture to this one, is the fact that she has all her clothes now! Here she is in her lovely yellow anorak that was sewn up using three pieces (1 for the back and 2 for the front) which was then turned inside out and decorated with a collar and buttons! She is also wearing a  black skirt that was made using layers of different fabrics: black felt, a black ribbon,taffeta and netting! the reason I use different fabrics is to add interesting texture and depth to the piece of clothing! I didn't want it to just lay flat on her legs.  I love the way that she turned out! She is cute but also a little bit creepy, just like in the film! I think this will be a great addition to my costume that I'm wearing on Halloween. I'll also keep her afterwards because she looks great!


If you make this, I hope you have a lot of fun like I did when I made this! You could make it with a friend or family member who's experienced with sewing if you'd like! I made mine with my Mum who's an experienced sewer!

Over to you...
What are you wearing for Halloween? Let me know! Did you give this project a go? 


16 February 2016

Cardmaking- my tips

Hey guys! There are so many great occasions to give a card for: birthdays, anniversaries, Valentines Day, Easter, Christmas and more! So today I'll be showing you my tips on how to make your own cards. When you create your own cards, they're more personal and show that you have put time into sending a special message! If you want some inspiration for your own cards then take a look at the photo of a card I made myself for an anniversary (at the top of this post)!

Image result for gold gel penHere are my card making tips:


Tip #1- Use sparkly gel pens- These sparkly gel pens can make small details glimmer on your card. I used a gold gel pen to draw a heart in between the elephants!


Tip #2- Use embellishments- You can buy card embellishments from any good craft store but I have used something slightly different! I use gold and silver bindis to embellish my card because I love the way they look on the card. I prefer them to the normal sticky gems that I use every now and then.


Tip #3- Use shaped hole punchers- If you want to create different layers on the card then you can punch holes using a shaped hole puncher. I used a heart shaped hole puncher to fit with my theme, but there are plenty of shapes for any occasion out there! After this you can put something on the inside of the card such as a patterned piece of paper that will show up on the front!


Tip #4- Stick with a theme- Like I said earlier, one of the great things about cardmaking is that you can really personalize the card!  Therefore, you can choose a really specific theme that the receiver will love to see! Instead of choosing Easter as a generic theme, for example, you could choose chocolate as a more specific theme. For my card, instead of choosing anniversaries as a generic theme, I chose  the 14th anniversary in particular to be a more specific theme. The two symbols for this particular anniversary were gold and ivory so I tied these into the theme with the colour scheme and the elephants! Have an idea in mind before starting your cardmaking!

Tip #5- Fill the spaces well- To create a professional looking card you should fill spaces well. This doesn't mean that you have to fill every gap, it just means that you should have a balanced looking card where spaces are used well. For example, if your card looks quite bare you could fill a space with zentangle designs like I have done with my elephant. Not every part of the card is filled but this looks tasteful.

I hope my tips have helped you out with your next cardmaking project or have inspired you to get making! I really enjoyed designing and creating this card, what cards have you made in the past or are planning to make? Let me know in the comments! :D

PS: Do you like the photo at the top of this post? I took time to layout the props, take the photo and to edit, I'm proud of the results! Do you think my improved photography is improving the overall blog? I'm aiming to include at least one well finished photo in most of my new posts!

31 December 2015

New Year's Essentials 2016+How to Keep Resolutions

Hi guys! Currently, it is New Year's Eve where I am and I'm very excited! A new year means a fresh start and lots of new opportunities! So it's time to make the most of it! Write down your resolutions so you can achieve great things throughout the year and celebrate! I have a few recommendations for products to buy to prepare for the new year so grab a blanket and cosy up for a blog post!

My first recommendation is the SprinkleofGlitter Diary for 2016! I absolutely love this diary! The design of the pages and cover are gorgeous! I love the unique style of the diary! I think it's great that there is an activity on the left page and normal diary pages on the right, it adds an extra something to your normal every day organisation! There is a great space for writing your new year's resolutions and the best thing about this feature is that it reminds you halfway through the year to look back on them! This is great because if you haven't done so well in the first half of the year, you can still have a go!


My second New Year's recommendation is the Chocolate Box Secrets book by Cathy Cassidy! It follows on from her book series but you don't need to have read her series to have this! I also love the design of this book, just like the diary but I also love how creative it is! This book has DIY projects, recipes, tips and more fit for every season! I love that there are projects for you to do whenever you are bored during the year! Seasonal arts and crafts are my favourite to do because they are great ways to celebrate the passing of the year!


Now it's time for my tips on keeping resolutions! I know how hard it is to keep resolutions but this year I'm determined to keep at least one of them! These are quite simple but hopefully they'll work for you!
Tip #1. Reward Yourself:
Sometimes all you need is a bit of motivation! How about reward yourslef for milestones in achieving what you want in 2016? Rewards include things such as treating yourself to something you've eyed for ages, watching one of your favourite programs (that would be Friends for me), meeting with a friend or something that sounds totally great to you! Remember this reward shouldn't clash with your goal. For example don't treat yourself with some gummy bears when you've been doing so well with your healthy eating/exercises. This would just tempt you back into your old routine.

Tip #2. Keep on Track:
This sounds SO obvious but it's an important one! Don't miss your chance to do well for your resolution. What I mean is if you have a schedule for your resolution (for example do gentle exercise once a day) don't skip a slot unless you need to. Even if you persuade yourself that you can do it the day after, it is very tempting to give up something once you have had a break. Think about how you feel after a school holiday, you don't want to go back do you? It's like this when you have a break from the progress of your resolution!

Tip #3. Come Back to Your Resolutions:
Like I mentioned in the recommendation section, I think it's great that in the diary it gives you a chance to look back at what your goals were! Even if you don't have the diary, you should do this! This is because you get reminded of what you wanted at the start of the year so that if you didn't do so well, you can still try your best to have a come back! This doesn't just have to be in the middle of 2016 either, it can be several times through the year! Also, to help you even more you could write where you're going wrong with your resolutions (i.e if you have a trouble with keeping to schedule or if you get distracted) and any other small goals you have to be even better at this!

I hope this post has been helpful for you! Have a great new year and achieve everything that you want most! Let me know what your new year's resolutions are in the comments and let me know if you have the two products I mentioned in this post! Remember to just have fun! Happy new year! :D


18 December 2015

How to Draw an Elf


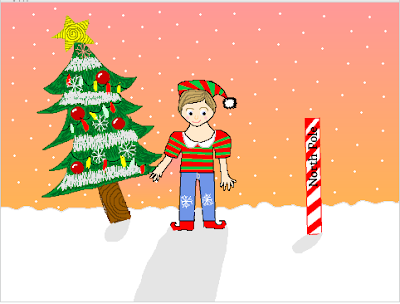
This picture is a link to my tutorial on How to Draw an Elf on scratch! Click on it to see howto draw the picture above!I hope you enjoy this Christmas drawing tutorial! Check out my other projects on my scratch profile! Also, if you like this drawing tutorial, you should check out this studio of all my tutorials!

06 December 2015

3 Gift Ideas for Girls

Hi guys! Christmas is just around the corner and I know that a lot of you are in need of some gift ideas...and fast! So today I'll be showing you 3 great gift ideas for girls. I've decided to stick to the gifts I know best so this post is only for girls that you need to buy for but you can easily change some of these ideas to suit anyone you know! Here are the ideas:

Idea#1: Gift Sets: Gift sets are an easy yet ever so good way of getting a gift for a special girl in your life! I particularly like gift sets from LUSH because not only are they beautifully packaged and full of surprises, but they also have a wide range of different prices so you can spend as little or as much as you want! If you would like a slightly different gift set you can find loads of beauty gift sets in Boots, so it's worth a look!

Image result for filled jar gift hot chocolateIdea#2: Filled Jars or Baskets: I see jar and basket gift ideas all over pinterest when searching for gifts! They may be a very common gift to give but they be easily personalised to suit whoever you give them to! If they have a hobby (such as baking, art or beauty) you can build the gift around that! For a baking jar/basket you can fill it with icing, cake decorations, cookie cutters, baking tools, cake mixes or whatever you think they would enjoy! For an art themed jar/basket you could fill it with high quality pens/pencils/paints, artist rubbers, good paintbrushes, chalks/pastels, sketchbooks (depending on what you use-jar or basket), etc.  For a beauty enthusiast you can fill the jar/basket with lipbalms/lipsticks/lipglosses/liners, mini eyeshadow palettes, eyeliners, etc. Another idea for filling jars or baskets is to chose a colour and buy anything and everything of that colour! It could be their favourite colour or perhaps red and green (for Christmas)! Yellow is a popular colour for the jar/basket filling because it symbolises happiness. If you can't think of a theme, why not do a hot chocolate jar with hot chocolate mix and toppings?
Image result for book
Idea#3: Book Package: If you know someone who loves reading then you can create a book package for them! Start by buying them a book that you don't think they will have (or one they have asked for) and then build the gift around that! You could buy or make them a special bookmark and slip it into the book for a surprise! Another idea is to put a set of slim sticky notes on top of the book before wrapping it so that when the receiver opens it, they can see them and use them to mark important parts of the story! As an extra gift, a gift card to a book shop could be put inside the book with a little note so they can buy more books! You can look for quirky reading accessories in many highstreet shops that a bookworm would love, so have a look around to see what you can find!

I hope I've helped you with my 3 gift ideas for girls! Let me know what you are giving to people at Christmas so we can all share ideas! What is your favourite idea from this post: 1, 2 or 3?  I'll be posting more things for Christmas in the upcoming weeks so keep checking back!

PS: Do you like my new Winter template? I'll be changing it seasonally! :)