Showing posts with label Tutorials. Show all posts

08 May 2017

How to Create a Gradient with Coloured Pencils

Hello everyone! Today I want to show you a technique I use all the time when I'm colouring, creating a gradient. The colouring book featured in this post is actually a calendar: Colour Yourself happy 2017-month to view calendar. This was illustrated by Heartfelt Illustrations (whose Facebook page you can see here). I have been enjoying creating gradients on the names of the month that are nestled amongst illustrations of nature. Anyway, I hope that you find this simple tutorial helful either for colouring or creating your own art!

Step 1: Apply your first Colour from the top:

In my case, I used a yellow coloured pencil for this stage. Take into consideration the size of your shape/letter that you're colouring and think where half way down the shape/letter is. This is where you will stop using this colour. Above this mid-point, split the section into 3. The top section is where you'll apply the most pressure with your pencil. The second section down is where you'll apply a middle pressure, not full pressure, but not the lightest pressure. The last section is where you'll apply the least pressure. You can clearly see the difference in tone in each section at this stage, but they'll blend together in later stages.

Step 2: Apply your second colour from the bottom:

Now that you've finished applying your first colour, you should be left with the bottom half of your shape/letter. You should split this into 3 sections as before. However, this time you apply the most pressure at the bottom and the least pressure at the top. It's basically the opposite of what you did before and in a different colour. So the section at the bottom is where you apply the most pressure, the section that is second to the bottom is where you'll apply the middle pressure and the section at the top is where you'll apply the least pressure. Make it so the areas where you've applied the least pressure with both colours are just touching slightly.

Step 3: Apply an 'in-between colour':

An 'in-between colour' is a colour that is a mix of the two colours you've just used. I used peach because it seemed like it would blend pink and yellow together well. This stage is a bit more difficult to explain so stick with me here. Apply the most pressure half way up where you've applied the least pressure with the first colour and half way down where you applied the least pressure with the second colour. Then apply a middle pressure from where you are right now to half way up where you applied the middle pressure with your first colour and half way down where you applied the middle pressure with your second colour. Finally, apply the least pressure from where you are right now half way up where you applied the most pressure with your first colour and half way down where you applied the most pressure with your second colour.

Step 4: Blend :

You might not be able to see much difference between the last photo and this one (apart from the labels) but that's because I've not added any new colours. I've just blended the shape/letter. You can use several things to do this stage: a blending pencil, a blending stump or a white pencil. There's probably a few more methods but those are just the ones I've tried. In this case, I used a white pencil since I can't find my blending pencil and I don't like blending stumps very much hehe. Just evenly use the blending tool/white pencil over the shape/letter, you may want to use circular motions  for this. Also, you may want to add a little more pressure in the middle of the shape/letter but it's up to you.

So that's how I create two colour gradients! I know I technically used 3 colours but it's a gradient from yellow to pink and you're not meant to see the peach as a third colour, it's only there to help you to create a smooth gradient. I hope that you could understand my tutorial and you found it helpful!

PS: If you want to see the blog series I wrote a while ago called 'Colouring Quest' here is the first part, here is the second part and here is the third part. Or you could just click the Colouring label that is listed on the right side of my blog to see all of my colouring themed posts.

Over to you...
Do you have any colouring tips? Share them in the comments. Also, what is your favourite medium ton colour with? Mine is Prismacolor pencils (by the way in this tutorial I used Prismacolor premier: canary yellow PC916, blush pink PC928, light peach PC939 and the white pencil PC938).

05 December 2016

Christmas Card Craft Idea

Hello everyone! I'm finally back with another post and it's my first Christmas one!I've had lots of revision to do recently so I took a few weeks away from blogging but I missed it so I'm back this week. Today I've got a lovely Christmas card idea for you to craft for your friends and family so get cosy and see how I made a wreath card!

 Firstly I chose a Christmas patterned paper, a plain card, a bow, a doily and a few Christmas washi tapes. You can find all these supplies (or similar ones) at The Works or The Range. These are two of my favourite shops for craft supplies since they sell a wide range of products for good prices. In ended up not using the button you can see in the photo or all of the washi tape but you might decide you want to. As yopuc an see I have quite the collection of Chrsitmas-y washi tapes-I've been collecting lots in the last few months!
 Now that you've got the basic supplies you can now choose all of the embellishments. You'll use these to decorate the wreath so you'll want small, festive embellishments. The ones you can see in the picture are: silver star stickers, enamel dots, crystal stickers, a range of Christmas stickers and Christmas phrase stickers. You probably won't sue them all on one wreath but I just got out plenty of embellishments so I could choose what looked best. I actually went with the crystal stickers, stars and mini candy cane stickers for the wreath. I also used a Christmas phrase sticker elsewhere on the card. I liked how the red crystal stickers looked like berries, the yellow crystal stickers looked like flowers and the green crystal stickers looked like sprigs or leaves. The enamel dots would have given the same effect but I wanted to give a sparkly effect to the card! By the way, some of these products were from a subscription box last month called Birmbles Box.
Here's the final result! started by cutting a strip of patterned paper and glueing it n the left side of the card as an accent. Originally, I was going to make a background with it but I think it would have been too overpowering. I cut the middle of the green doily out so that it looked like a wreath. Once you've glued down the patterned paper and green doily you can personalise it however you want! This is where the embellishments come in! I spread out the crystal stickers, stars and candy canes evenly around the wreath. After decorating the wreath, I created the ribbon. In chose a washi tape and cut a small section of it to go above the wreath, To give the impression of a real wrath, I then put a bow on top of the washi tape. I used double sided sticky tape for this. To finish off, I used washi tape and a phrase stcker in the centre.

There you go, that's how I made the wreath Christmas card and I love how it turned out! It's such a unique card; I thought of it when I was looking at my Christmas craft supplies, I knew I wanted to use a doily but I didn't want to just stick it down so I did this instead! So now you're ready to make your own Christmas cards, let me know if you make any.

PS: I've changed the background for Christmas now. Do you like it? I created it with the PicMonkey overlays, sorry that I didn't draw any of the elements this time round. Hopefully my next background will have some of my drawings.

Over to you...
Have you made this card idea or any other Christmas cards this year? Tell me about it in the comments. Also, do you have any Christmas blog post ideas? I'm looking forward to writing plenty of Christmas posts!

13 September 2016

Starting a Fashion Sketchbook!

Hello! As you probably know, fashion design is something I am very passionate about. With that in mind, I decided to share a fashion related project with you all this week! At the moment I am working on creating a fashion sketchbook/portfolio to practice my design skills in! I am super excited to start sketching inside my unique portfolio! I'm going to show you how to create your own fashion sketchbook step by step and share some ideas of how to fill it up!

Step 1: Choosing your book
To start your project, you'll need a book such as a large notebook, sketchbook or scrapbook. I bought a plain scrapbook from Paperchase which has some cream pages and some thicker brown pages in the centre. I wanted a plain scrapbook so that I could decorate it later on. However, if you don't want to decorate it like I have, you could buy an already patterned scrapbook (Paperchase has lots of cute patterns such as pineapples and polka dots).

Step 2: Collecting images
If you're planning on decorating your front cover with a collage then you'll need to collect some images that you like. I chose pictures that inspire me because I'll be looking at them every time I start to create a fashion design. You could collect fashion quotes, fashion designs, photos of accessories, your fashion icons and anything else that you would like. You could either print off images you find or cut out pictures from old fashion magazines to use.

Step 3: Putting it together
Now that you've got all of your images ready, you can start decorating the cover! Start by laying out your images until you're happy with the layout. If you start gluing straight away, then you might make mistakes! You don't want that do you? Once you've glued everything down and there's still spaces you could fill them in with stickers or scraps of fabric. Whatever you want really, this is your fashion sketchbook after all!

Step 4: Start designing
Yay! You're ready to start designing! There's lots of things you can do inside your personalised book. You could try:

  • designing a fashion collection for a season or with a theme
  • displaying your fashion styling photos
  • practising drawing fashion figures
  • creating moodboards
  • working on new drawing techniques
  • analysing other designers and stylists work
I hope you enjoyed this week's post! I has lots of fun thinking up ideas of how to fill up fashion sketchbooks/portfolios! The reason I decided to start using a book like this is so I can practice creating something a bit like a portfolio. Whenever I apply to a fashion course, I'll need to show a fashion portfolio. I wouldn't show this portfolio (because the portfolio I show would be created with the course's requirements in mind) but it will be useful to practice developing design ideas right now.

Over to you...
Let me know in the comments if you tried out this project and if it went well! Also, do you have any other ideas of what to do inside this book?

PS: Do you like the new background of my blog? I drew the pineapple pattern myself! If you don't know already, I like to change up the look of my blog every now and then (normally when the season changes but I missed changing it for Summer so I might make a new Autumnal one soon)! 

18 December 2015

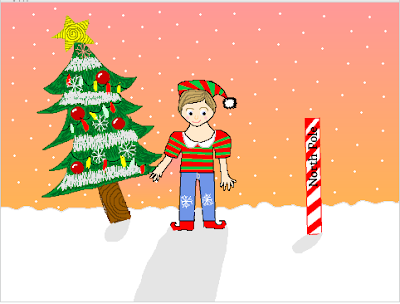
How to Draw an Elf


This picture is a link to my tutorial on How to Draw an Elf on scratch! Click on it to see howto draw the picture above!I hope you enjoy this Christmas drawing tutorial! Check out my other projects on my scratch profile! Also, if you like this drawing tutorial, you should check out this studio of all my tutorials!

27 October 2015

Halloween Costume Ideas 2015

If you haven't already decided on a costume for Halloween (either because you have no clue or because you like to go last minute), then I've got your back! Today I'll be giving you some slightly creepy costume ideas which can be put together with some of the items you have at home and some cheap props from a quick shopping trip! This post is a mixture of my ideas from last year (but with extra tips on how to wear it) and some new ideas.

.Coraline- a blue wig, yellow coat, red top, jeans and wellies are all you need to be Coraline for Halloween! You can get cheap wigs from pound stores at this time of year or you can purchase a blue coloured hairspray to go on your own hair! You'll probably already have a red top, jeans and wellies (they don't HAVE to be yellow, people will still get the idea). Hopefully you'll have a yellow coat like Coraline, but if you don't you could either buy one or just wear a yellow jumper/cardigan instead! Why not get your Mum or friend to dress up as the Other Mother or a different character from the film too?

.Broken Doll-This year I'm dressing up as a broken doll! What's great about this costume is that  can easily be changed and look just as good even if you don't have all of the clothes/makeup listed! For the outfit you should have any dress, preferably one that reminds you of strange dolls (perhaps a floaty of frilly one). For the hair you can either do 2 plaits or ringlets (for an obvious look) or slightly messy hair that you leave down (for an easy hairstyle). For the makeup, either use pale foundation or face paint to look like a porcelain doll then use pink blush and lipgloss to add a girly look. Apply lots of mascara/fake eyelashes and use white eyeliner on the bottom of your eye to make the appear bigger. At this stage, if you really want to look scary, you can put red eye shadow under your eyes and then use drops of fake blood over it, to make the doll look like it is crying blood (this stage is not necessary, it just depends on the look you are going for). The main stage for makeup is to draw a crack on the cheek so that people know you are a BROKEN porcelain doll. You can do this using black eyeliner and filling it in with black face paint. Remember you can miss out some stages and add in your won ideas depending on how much time/materials you have. To top of the look draw some joints on your shoulders, neck and knees with eyeliner and make it look realistic with brown eye shadow to create shadows!


.Zombie-To create a last minute zombie look first start by putting cuts in old or cheap clothes that you won't want to wear again. You can also put fake blood on these clothes if you have it (remember to choose the right one for fabrics). For the makeup use pale foundation/facepaint, like in the broken doll costume, and contour your cheek bones with green/brown toned eye shadows. You should also use the same makeup to create large dark circles under the eyes for the undead look. You can also put fake blood around the mouth (use a different one than the one you used on your clothes) for a gruesome feel. Remember to make your hair messy and don't do any special hairstyles, you could backcomb it instead!

.Sugar skull- To be a Mexican sugar skull, you'll need lots of face paint, you can buy this from pound shops or costume shops for small prices! Look up designs online for inspiration however, sugar skull designs are all unique so there isn't one way to do it. But typically, there are flower petal designs around the eyes and teeth lines on the mouth along with swirly patterns on other areas of the face. The outfits can really be anything, a great accessory for he outfit is a flower crown (preferably ones with marigolds on them, but you don't have to). I was a sugar skull last year and it was very fun, however isn't as scary as other costumes, which is good if you don't enjoy horrific outfits. This look is very trendy too!

.The Joker- All you need for the Joker costume is face paint/makeup, a green wig/hairspray, and purple and green clothes! The joker may be a male character, but you can still dress up as him if you are a girl! This twisted villain is a great costume for Halloween that shouldn't take you too long to put together! For the makeup you should use white paint or extremely pale foundation for the base colour (you don't need to put it on the neck, just the face) then black face paint or black eyeliner and eye shadow for around the eyes and creases in the forehead. For the lips you can either use red face paint or lipstick depending on what is available to go on the lips and to be smeared along the cheeks. The real joker wears a green and purple suit, but if you don't have this already (mos people won't) then you can just wear any purple and green clothes (such as a purple dress/top and green leggings). To top off the look wear a green wig or spray your own hair green.

I hope I've helped you decide on what you'll be wearing this year (or given you inspiration for next year). Still need ideas? Check out this post then with some extra ideas,! Let me know what you're dressing up as for Halloween this year in the comments below! I'd love to here what you're going to be and how you're creating the look! It may help other people to decide on theirs! Have a great Halloween!

PS: I've dressed up as all of these costumes from the post (apart from Coraline who I'm planning on dressing up as next year, or perhaps the other mother instead).

PPS: I hope you like the new look of my blog! Also, please vote in the poll that is going on at the moment! I'vce already done several seasonal posts because people requested it!

24 October 2015

How To Create Zentangle Inspired Art


 Today I'll be showing you how to create zentangle inspired art. I call it zentangle inspired art because it isn't an actual zentangle but it includes similar elements such as intricate patterns (but only here and there). The drawing style zentangle was originally created as a meditating method to relax you. It's true that drawing detailed pictures can calm you down, however I do zentangles because I love the overall affect of this technique. In this post I'll be showing you my practice exercises that I do before starting this type of art. I hope I help!


To start off, I drew elements that I wanted to include in my drawing. This can really help because you can get used to drawing things you have never drawn before (this was my first time drawing bats, as you can tell :P). Also, this is your chance to adapt your drawing style. This really is the time to experiment! I had fun creating spooky faces on the pumpkins, skulls and ghosts! You can try different shapes and sizes to create a new look! My top tip is to put ticks and crosses next to your doodles. This doesn't necessarily mean you will include them in your final piece, it just says to you whether you like the way it looks or not. In one way, this practice page helped me to decide what I was actually able to draw in my last piece because I then knew that I didn't want to include ghosts as I couldn't get it right.


The next stage of the drawing process was another practice page, this time it didn't go into so much detail. It just had a few practices of each technique until I got them right. To create this practice page template, I just drew a few small boxes. From then on, I started drawing Halloween patterns in them and decided whether they were good or bad. To fill the space I did a quick practice of the main drawing, a little witch. I did a colour test on the doodle to see what worked best together.


It was then time to start the real thing! I kept looking back at my practice pages that proved to be very helpful! I used the elements from the first exercise to fill the spaces at either side and the pattern page to fill the little witch. There were some extra doodles on here that I didn't practice. If you are having trouble coming up with new ideas for your drawing, you can search keywords on google images such as Autumn, Halloween or spooky. Remember! You should only be inspired by other artist's work rather than copy them; you want to create a unique piece that you can be proud of! Now you can either leave your zentangle inspired art black and white (this is traditional) or you can continue onto the next stage like I did...


The final (optional) step is to add colour! This is where the colour test comes in. I looked back at my colour test and made a new colour scheme with different shades that I thought worked well together. This is a Halloween picture so I tried to include , orange, black, green, purple and metallic colours to give a spooky feel to the drawing. I made a gradient of dark purple to pale blue for the early evening sky. I scattered hundreds of little silver stars over the sky to make it look magical. I love the overall effect of this picture; I poured hours of my time into it and I feel it's worth it! I hope this has helped you to gain new skills and think about practicing in a different way. Let me know in the comments what you have created with my tips and what other drawing posts you would like to see on this blog!

PS: Don't forget to vote in my poll to tell me what type of post you want to see soon! If you voted for a seasonal post, (as well as this one) you'll see plenty in the next few weeks!

06 September 2015

B2S DIY Notebook

Hi guys! Some of you may have already gone back to school but there's still time to make your notebook cute! Today I'll be showing you how to make a collage notebook! On the right you can see my DIY collage notebook! Cute right? The best thing about this tutorial is that it can be completely different to mine! Here's the simple tutorial:
1.) Find a plain, cheap notebook that you will be decorating!
2.) Choose a cute piece of paper that can fit your notebook!
3.) Cut it to size. You can either have just the front covered or both the front and back covered! It's up to you!
4.) Stick the paper down
5.) Look for images online of your favourite things or just search for pretty things!
6.) Put them all on a word document and print them off!
7.) Cut them out carefully and arrange them on the notebook.
8.) One by one, glue them to the front cover.
9.) Fill the empty space with things like washi tape, sequins, glitter, buttons ect.
10.) Enjoy your unique notebook!


That's just the start of creating your own notebook! You can see in the pictures above that I have done some cool things inside the book as well! On the left there is a picture of the first page. On the first page of the notebook, I stuck lots of motivational quotes that I can look at whenever I want to! I got all of these quotes off of google images and printed them off! On the right, I have another page in my notebook! I have decided that on every page there will be an activity on the left and a notes page on the right! In this particular picture I have chosen to put a mini 'adult colouring book' page on it. On every notes page I have chosen a cute sticker to decorate it with! 

You don't have to do this with your notebook! Here are some more ideas for the inside of your notebook:
.write your timetable inside it
.write down your homework and when you have to give it in
.use it as a sketchbook/doodle book (you can't doodle in your exercise books)
.write down story ideas (if you're a writer)
.write down blog post ideas (if you're a blogger)
.write down lyrics to songs (if you need to learn a song)
.write down a script (if you're in a play)
.write down music notes (if you're a...you get the point)
.write translation pages for the language you're learning

There's so much you can do with your DIY notebook! I hope you try out this simple tutorial!

PS: Don't forget to check out my giveaway that's going on at the moment by clicking here!

01 September 2015

My Terrific Ten Art Tips-Guest Post with 5 Star Artists

Hiya! I’m Kenza, author of 5 Star Writers and 5 Star Artists, an enthusiastic writer and artist who enjoys… you got it, writing and drawing! XD Today I’m hosting a guest post collab with Megan, which we’ve been really excited to share with you guys and hope you’ll enjoy!! :D For my part of the collab, I have decided to share ‘My Terrific Ten Art Tips’ . This is my first detailed art tutorial, put together especially for this collaboration, so I’ve done my best to choose art tips that would help all those artists out there willing to draw something awesome!

Be sure to check out Megan’s post, ‘What’s In My Sketchbook’ which is now featured on my art blog! You are guaranteed to like it!

If you’re interested in this post, please do check out my art blog, 5 Star Artists for more. I always do my best to share things that’ll interest my watchers. :)

Enjoy! :3

1) Start with the Eyes: When drawing characters (animated character fanart especially), I recommend you start drawing the eyes before anything else. (However, don’t of course go into detail until you’ve drawn everything else.) Not only does it help get the proportions right, it also helps you draw the eye in a more accurate way. Moreover, eyes are known to be what define a character’s appearance.

2) Play Music: This isn’t absolutely necessary, but I find that music makes drawing feel less time-consuming. When I draw, I’ll find a track that best fits the thing I’m drawing, say Let It Go when I’m drawing Elsa, Zen Ball Master when I’m drawing Po, I Can’t Wait To Be King when I’m drawing Simba, etc. … it doesn’t even have to have lyrics. Another interesting thing is that lots of artists out there are inspired by music to draw something. It’s cool!

3) Practise Drawing Hands: Hands are known to be one of the most complicated body parts to draw, according to most artists. They have a random form that is hard to copy. The best you can do is practise drawing them. Every so often, when I have the time, I’ll think, okay, I’m going to draw some hands again. I’ll get my spare art book (I totally recommend getting a spare one – it doesn’t even have to be heavyweight) and I’ll sketch some different hand shapes, either hands of animated characters (this is a good way to start) or of real hands. Try Elsa (Frozen) if you can – her hands always make interesting shapes and the good thing about it is that it gets you practising the easy way.

4) Draw Hairstyles: I personally find drawing hairstyles one of the most fun parts of drawing a character. Why? Because you can get really crazy and creative with them. I would also recommend practising them. When drawing hair, be sure to start at the parting. It helps a lot. Furthermore, if you draw a manga character, be sure to draw a hair line. This helps get the hair in an accurate position.

5) Use References: Almost all artists use references when they draw. References are there for everything… to inspire, to get things accurate, to help you develop your own style, and so on. Honestly, I don’t recall doing any good art pieces without using a reference. Bear in mind, there’s no restriction to how many references you can use. The more you use, the better!

6) Try Different Ranges Of Pencils: Okay, so this really does help when you draw, believe me. There are lots of artists out there who just use an HB pencil (I don’t blame you if you do, though, because of course a lot of people only have HBs as they’re also handy for writing. XD). You can get different ranges everywhere (good quality ones include Faber Castell, Royal & Langnickel and Derwent Academy). I recommend a set of 6B-5H if you can, but 3B-2H at least. Most people start their drawings with a 6B because it’s softer and easy to rub out. I, personally, then use a 2H (sometimes I even start with a 2H when doing fanart, haha) and a 5H for extra details. When you’re doing eyelashes, try a (sharpened!) 2B – it works better. Whatever you do, *SHARPEN YOUR PENCILS*. (Okay, I think I’d better stop my lecture on pencils now… XD)

7) Go Over In Ink Pens: I could go on forever about ink pens, but for now I tell you, not only do inks pens make your art stand out, they also preserve it for longer. If you don’t, you’ll soon find that the pencil lines smudge (Especially 6Bs. Most definitely.) When doing thin lines or eyes, I use a very fine tip, either an XS Calligraphy Pen or an ink pen of 0.05. When doing thicker lines, I use an S Calligraphy Pen or an ink pen of 0.1+.


8) Perfect Your Artwork: Once you’ve finished what you’re drawing, perfect it. Just try. Correct the proportions, add on more details, etc. Anything, anything at all that makes your picture look better. You’ll be glad you did it, because if you race ahead and colour, there’s a good chance you won’t be happy with the results in the end and it’ll be too late. Lesson learned (the easy way). (excuse the handwriting in this one)


9) Use A Manikin: If you’re drawing a person, and you aren’t copying something, then use a manikin. They help a ton, believe me. You can easily twist the wooden body parts into the shape you desire (jumping, sitting, waving, the splits, a pirouette, anything). Just copy it, draw the outfit on top and then rub out the manikin shapes. I know it sounds a bore, but it’s easier done than said! You can buy them in shops like The Works. I’ve got a small one and a big one (personally, I think the big one is better).


10) Compare Your Artwork: If you ask me, comparing artwork and looking back at your old pieces is an important thing for an artist. We all improve by learning from our mistakes and the only way to do that is facing our mistakes (even our worst fails). If you do fail an art piece, don’t rub it out. It’ll help you improve looking back at it in future. I don’t mean to be superior about my artwork, but I’ll admit I’ve improved a lot over the past year. (As for the old ones in this picture, I drew them over a year ago).

I also have some bonus tips to share with you guys!
1) Try reflecting your artwork (all you need to do is hold your artwork in front of a mirror and all the mistakes you haven’t noticed will show up – it’s a really cool life hack!)
2) Sharpen your pencils (yes, I’ve mentioned this in tip #6, but I just need to emphasise how much this helps when drawing)
3) Buy a heavyweight art book (they may be higher in price, but they’re absolutely, totally worth it… otherwise, get an art book over 139gsm… you see, if you don’t, it’s easy for pens/paints to sink through the paper or rip when you keep rubbing out – and we all know that’s totally annoying.)
4) Start with a rough sketch without pressing hard (otherwise, you might find later that you’ve made a mistake and can’t correct it easily)
5) Doodle (true fact: it gives you ideas and even helps you think, Zentangles especially)
6) Don’t be afraid to make mistakes (if you don’t make mistakes, then you won’t improve, so it’s perfectly fine if you do!)
7) And most importantly, KEEP PRACTISING! :D (whether you decide to follow any of these art tips or not, just keep practising… you want to draw a complicated mansion, a detailed dinosaur, a beautiful background? Just keep going at it and you’ll be a master of it in time to come.)

Thanks for reading! It’s been a pleasure to write for Megan’s blog and I hope you artists out there learned a thing or two from this! :D Keep drawing and keep your imagination racing!


Note from Me:

It was lots of fun writing with kenza and for her brilliant blog-so please check out 5 Star Artists to see what other amazing posts she has come up with! You can find my guest post 'What's in my Sketchbook' in her blog too! I hope you enjoyed this collab! Let me know in the comments what your favourite tip of hers was! Also, please check out the giveaway going on at the moment on my blog, by clicking here.


24 July 2015

Lemon 'Cheese' Cake and Mojito Mocktail Recipes for Summer

Hi guys! Today I'll be sharing two Summer recipes with you that you can try out. These recipes are from my Auntie Beverly and are perfect for an afternoon tea party so I hope that have a go yourself!


Here is the recipe for the lemon 'cheese' cake. The reason it is called lemon 'cheese' cake is because it isn't actually a cheesecake however it has a lemon cheesecake flavour. You can see the cake in the photo above, it looks so pretty and delicious!

Ingredients

For the cake:
1600g golden caster sugar
160g butter or margerine, softened
3 large eggs
160g SR Flour
zest 1 lemon

For the syrup:

2 tblsp icing sugar
juice 1 lemon

For the frosting:

2 x 250g tubs mascarpone cheese
1 tblsp (heaped) icing sugar
2 tblsp (heaped) good quality lemon curd
A few strawberries for decoration

Method:

Heat the oven to 180°C/fan 160°C/gas 4

Line the base and sides (using baking parchment) of two 20cm round cake tin.
Beat the sugar and butter together until light and fluffy.
Gradually add the egg, one at a time, beating after each addition. If the mixture curdles add a spoonful of the flour each time.
Fold in the rest of the flour and the lemon zest.
Tip into the tins, level the top, then bake for 25-30 mins or until golden and a skewer inserted into the middle of the cake comes out clean.
Whilst baking, prepare the syrup.
In a small pan mix the icing sugar and the lemon juice together, heat gently until the sugar has dissolved, remove from heat. When cakes are baked, remove from oven and whilst still in the tin prick gently with a fork then spoon over the syrup as evenly as possible. Leave in the tin to cool for 10 to 15 minutes before turning out onto a wire rack.
Prepare frosting by beating together all ingredients
Let the cake cool completely. Sandwich together, using about 1/3 of the frosting. Cover the top and sides with frosting. Pipe decoration around the base. Place prepared half strawberries around the side of the cake above the piping and use any left over frosting to pipe above the strawberries.

Yum! Lemon ‘cheese’ cake.

Now that you have a great Summer cake, you can make yourself a refreshing drink. This is the recipe for a mojito mocktail (a mocktail is suitable for anyone because it doesn't contain alcohol). You can see the mocktail on the photo above. Here is the recipe:

MAKES ABOUT 4 to 6 Mocktails

To make the cordial:
2 tblsp sugar
Small bunch of mint
7 limes

To serve:
Ice cubes (lots)
Low calorie Indian tonic water with cucumber (Tesco)
Sprig of mint
Slice of lime

A straw, umbrella, cocktail swizzle stick etc.

Method:

Muddle the sugar with the leaves picked from a small bunch of mint using a pestle and mortar (or use a small bowl and the end of a rolling pin). The idea is to release the oils and flavour from the leaves using the sugar as an abrasive. Add the juice of the limes and pour into a plastic container (with lid), place in the fridge for a couple of hours or overnight.

Remove from fridge and strain into a jug.

Place crushed ice into glasses. Divide the cordial and top up with tonic water. Add a sprig of fresh mint, a slice of lime and a straw. Decorate with umbrella if you wish and enjoy.

I hope you all have a great Summer and try out these amazing recipes! Let me know in the comments if you have any Summer recipes to share! 

14 July 2015

How to Prepare for a Talk/Presentation!

Image result for wikihow logoHi guys! Today I will be showing you my tips on how to prepare for a Talk/Presentation. I submitted this as a WikiHow post and it took me such a long time to write so I decided to make the most of it and post it here too! I hope you like it! If you want to see more in-depth tutorials on here, let me know in the comments (perhaps next time I could tell you something about fashion design). This post should be helpful if you are preparing for a test at school or if you need to do a talk at work! Here we go!

 1. If you get the choice of what subject your talk is about then choose something you are passionate about because you need to know lots of information about it for your presentation to be detailed and clear. A good topic for a talk is one of your hobbies that you take part in often and have done for a few years. However, if you don't have the choice of what topic to talk about make sure that you do plenty of research. It may seem like a dull topic to you but you need to find what interesting facts there are about it so that you don't seem bored when presenting the talk.

2. Write down notes about what you're going to say in each part of your talk. To start out, you need a simple structure. An effective structure can consist of an introduction and 4 other sections. If you are doing a talk about one of your hobbies, a good section 4 is how to start this hobby for a beginner (e.g Fashion Designing Tips for Beginners) which is a great sum up of the information you have talked about previously which is adapted to be easy for beginners.

3. Now you need to prepare a visual aid. Contrary to popular belief, powerpoints can be a brilliant visual aid for behind you as you talk. Many people argue that having a powerpoint behind you as you talk can ruin the whole presentation because you are constantly looking at the screen, rather than your audience. Additionally, it is often said that that presenters end up reading off of the screen (as well as their audience) and it isn't so much of a visual aid but more of a  bunch of text on the screen. Part of doing a good presentation is communicating with your audience so this is why lots of people swear against powerpoints. Nevertheless, powerpoints have the ability to be great! You just need to remember the word 'visual'. A powerpoint is just a visual aid so shouldn't have tons of text on it, it can have images, video and effects to aid what you're saying. Visual aids help the audience process what you are saying and remind them of the point you are making therefore visual aids are a must and powerpoints can be effective! Make sure you still use eye contact when you are presenting rather than looking at the screen constantly to look like you are actually talking to your audience instead of just reeling off words.

4. As well as eye contact, there are many other things you need to consider while you are carrying out your presentation besides the words you are saying and the visual aids you are showing. You want people to find your talk interesting and it's not just about what you are saying! Many people tend to pick up a monotone while they have been talking for a long duration of time (such as when they carry out a talk) which can be extremely tiring for the audience to listen to and although they may appear to be listening, several have probably switched off. To avoid this, you need to change the pitch of your voice as you speak to show expression. You can emphasize important or surprising facts and figures to regain people's attention. To illustrate your point, it can help if you do hand movements. When you are describing an image on the screen you can point towards it etc. To look friendly, approachable and interested, make sure you're stood upright with your back straight as a pose to being slumped and shy, your posture is important too.

5. When you think you are ready to come up with what you want to say you can make cue cards. Cue cards are brilliant because they only have a few key notes on them to prompt you. You should keep eye contact with your audience at most times so reading a lot of text at a time means that you  are constantly looking down, cue cards are a great solution for that problem! You should number your cue cards so that you know what order to read them in. Perhaps a queue card for each section (including the introduction) would work best?

6. Choose a video that fits the theme of your presentation. The video should be about 2-3 minutes long because if it is too long then it can become quite tedious but on the other hand, if it too short then there isn't a long enough break between you talking. A short video can be the time where you prepare yourself for the rest of your talk and it can act as a break for the audience where they can don't have to concentrate on what you're saying so much (often class talks are not only speaking tests for the presenters, but also listening tests for the audience). The video has to be relevant to your topic (obviously) but it can explain something that you have been struggling to put into words (if you would like). If you want it to be easy to listen to, it should have background music, quick bullet points explained briefly and images on the screen. The good thing about including a video is that you can have a break from creating content. If you are doing a presentation at school you need to be sure that the video can actually be played when you arrive.

With these tips, your talk will be a hit!

20 June 2015

Friends Inspired Father's Day Card


Looking for last minute father's day ideas? Oh no. Luckily for you, today I've got the perfect card idea for a dad who is a big fan of the comedy, friends! Hopefully I will inspire you to make your own card! 

1. To start off making my my card I looked up Monica's peephole frame on google images and printed it off so it would be a decent size on my card
2. I then cut out the frame and glued it onto the front
3. For the typography I looked up the friends logo then copied the style to say FATHERS DAY. The whole text says The one with the Fathers Day 2015. Every episode title starts with the words 'the one' so that's why my card starts with that.
4. I looked up quotes that Chandler (my Dad's favourite character) said and wrote them in bubbles on the left side of the inside of the card
5. I then wrote my message on the card (on the right side of the inside, obviously)
6. I looked up an image of a quote that seemed fitting and stuck it on the bottom of my message

So that's it! It's quite easy but very fun to make and will be appreciated more than a shop-bought card! :D If you make this yourself- of course it doesn't have to be exactly the same so here's some ideas on how to change it up a bit:
. change the special occasion it is for-
you could change this card so it could be for a birthday, Christmas (or even thanksgiving if you're American). These special occasion cards can be adapted so they are real episode titles too (for example the one with the birthday is an actual episode where it is Rachel's birthday). 
. change the quotes that you use-
I only used Chandler quotes for mine because he is my dad's favourite character but you can use any friends quotes you want. If the person you are giving your friends card to has a favourite character, you can use those! If not, just use a mix of quotes that are awesome!
. change the picture quote at the end-
Choose a picture quote that matches your card! For example if you change it to be a birthday can you could use this: 
Here are some more photos of my card:
The Quotes

The Photo Quote
I hope I helped you make your very won friends card today! I love the comedy friends just like my dad so if you have any cool facts, favourite moments or hilarious quotes from the show let me know in the comments! 

30 May 2015

How to Make a Luma Plushie (from Mario Galaxy)

Recently I have been playing Mario Galaxy on my wii again so I decided to make a plushie of one of the characters! I chose Polari (the black luma with blue eyes) to make but if you make your own plushie you can choose any luma you want. I've written some simple instructions for you below so feel free to make one for yourself (you can't sell them though because of copyright issues).


What you will need for this project

You will need:

. a generic luma template from google images
. a large piece of felt in the main body colour
. a small piece of felt in the eye colour
. a long piece of thread in the body's colour
. a shorter piece of thread in the eye colour
. a needle
. pins/pen in a different colour to the fabric
. Stuffing
. paper scissors
. fabric scissors (not necessary)


Let's get started!
1. First of all you need to cut out your template with paper scissors
2. Pin**it to your large piece of felt securely
3. Carefully cut around the template with fabric scissors (if not you could use paper scissors)
4. Flip your template over, pin**it and repeat step 3
5. Now you have your body pieces you can cut out 2 ovals from the other fabric for the eyes
6. Choose one body piece that will be the front and place the eyes on it
7. Use felt stitch*to attach each eye onto the felt shape (using the shorter thread)
8. Place the front and back pieces of your luma together
9. Now you can start to use blanket stitch* to attach it together (using the longer thread)
10. Make sure you leave a gap for stuffing
11. When you are stuffing the luma plushie put more in the centre to make it look more realistic
12. Once it is stuffed you can sew up the rest with the same stitch as before
Finished plushie example

You have finished your luma plushie! 
Here is a picture of my finished Polari luma plushi! Yours should look similar once you have finished but of course it may not be black with blue eyes-it could be any colour!


* If you are unsure on how to do these stitches then you can look up simple tutorials online.
** If you are using a lighter colour than black you can just draw around the template then cut it out