31 October 2015

What to do When You're Bored on Halloween

I was recently looking at my blog stats and I noticed that my 'What to do When You're Bored' post was the 5th most viewed post and this got me thinking! Why not do a Halloween edition of What to do When You're Bored? Since most of you wanted to see a seasonal post, this is what I decided to do!
     Imagine this, it's October 31st and everyone is in a hurry getting ready for the evening, cooking up a spookily delicious meal and decorating the house. It's so busy that you're told to entertain yourself for a few hours before everyone arrives for a frightfully brilliant party. Well what do you do now? You're very bored and just can't wait for the evening so you decide to look for ideas. Now you've found a list with everything you're looking for and here it is! Take a look:

.Watch a movie-this one may be pretty obvious but it really does help pass the time, remember to look up if they are appropriate for whoever's watching! Here are some of my recommendations:
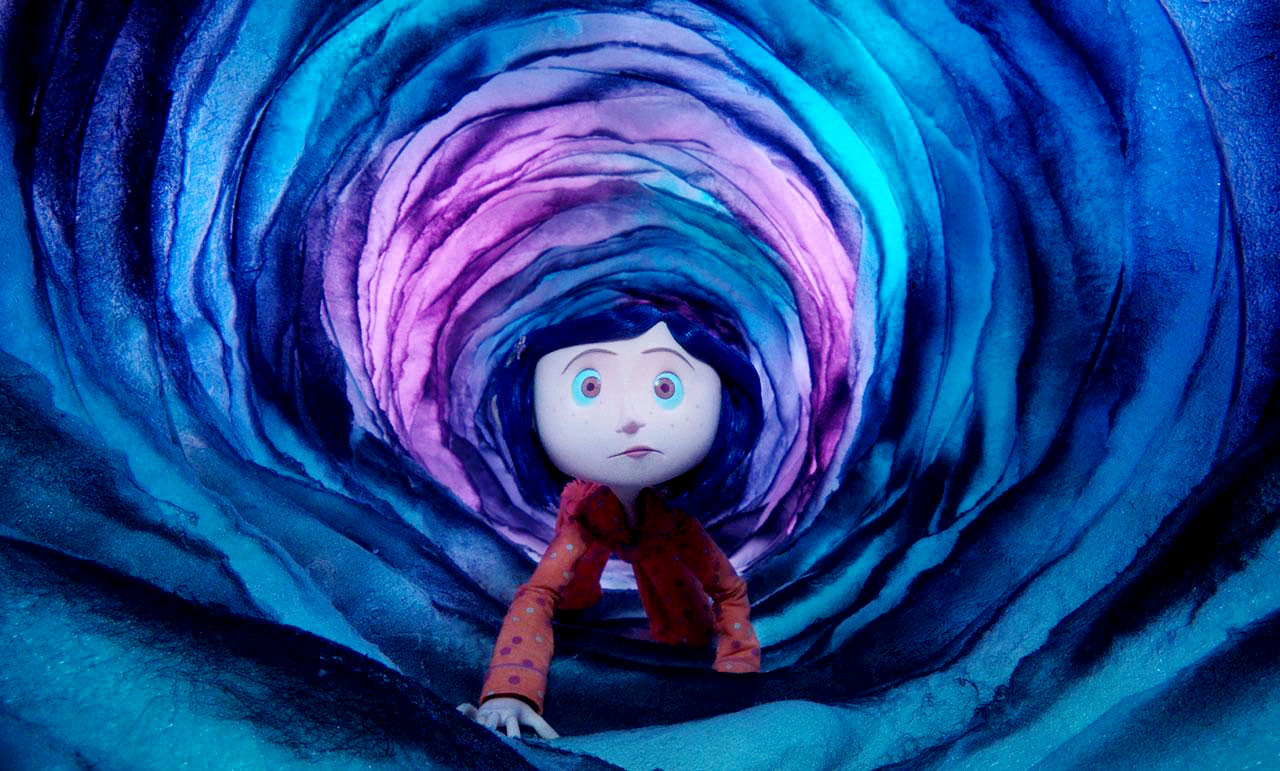
-Coraline
-Beetlejuice
-Hocus Pocus
-The Corpse Bride
-Caspar the Friendly Ghost movies
-Little Vamprire
-Frankenweenie
-Ghostbusters
-Hotel Transylvania
-Monster House
-Paranorman
-Edward Scissorhands
-Harry Potter series?
-Shaun of the Dead
-Labyrinth
-The Witches

.Read a book-you may not get through these in one day, but reading a spooky book can really get you in a Halloween mood. I strongly recommend the book Scarlett Dedd, it's absolutely amazing, I could hardly put it down! It was just the right mixture of creepiness and humor, perfect for young teens! Once you've read the book, you should totally check out the blog that goes along with it, it's part of the story! Instead of reading this, you could always try a classic one such as Dracula or Frankenstein or perhaps read a few short ghost stories?

.Make something-this one involves a bit of creativity and skill but you could always make something for Halloween! Decorations are a great idea, you could try making orange and black bunting, hanging decorations (such as bats), a spectacular centerpiece or something else of your choice! There are tons of tutorials online ranging from very simple to extremely difficult but you could just use your own ideas that include materials you already have!

.Bake something-if there's room in your kitchen, this idea is so fun for you to do! Grab a few ingredients and a recipe then hit the kitchen! Why not bake cupcakes, biscuits or create some snacks? It's all about the fabulous decorations! You could create spiderwebs or pumpkins on some of the cupcakes or turn gingerbread men into mummies, skeletons, vodoo dolls or zombies.Your bakes make great party food if you're planning to have family or friends around in the evening!
Image result for ghost
.Write a short ghost story- You don't have to be the best writer to do this, all you need is a bit of imagination and time! Surely Halloween is the best time to do this? For inspiration you can read a few stories online or perhaps find some eerie images that give you some ideas.

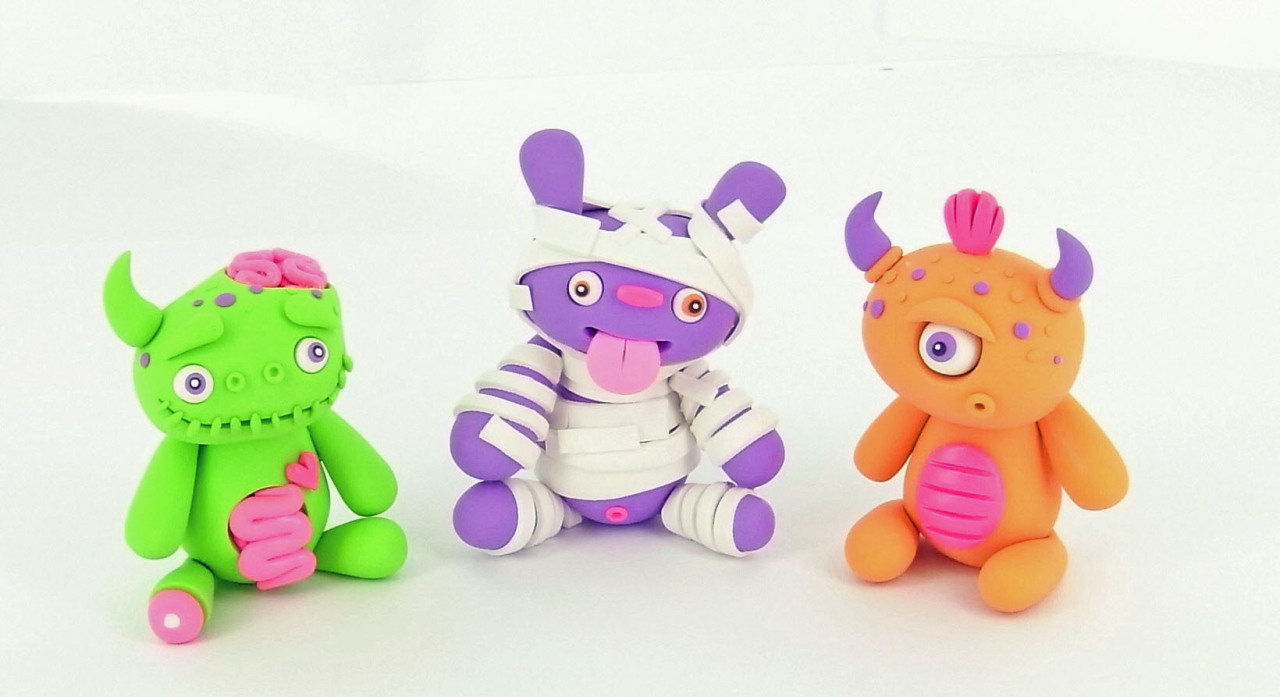
.Create a monster- This activity can be changed to fit what you feel like doing. You can either draw or make your own monster using whatever you have at home. Be as creative as you like and once you've finished you could even write a story or poem to go with it or post a tutorial on your blog (if you have one) on how to draw or make it! Inspire others to do the same! You can then display it with pride at your party or simply in your own room! If you still have more time, you could make a few!

.Read my Halloween posts- If this isn't self-promo, I don't know what is ha-ha! Anyway, in the past I have published several posts at this time of year that offer inspiration for a fiendishly fabulous time, Here are the links to... the 'Halloween Costume Ideas 2015' post, the 'How to Create Zentangle Inspired Artwork' post, the 'Halloween costume ideas' post (from last year), the 'How to Draw a Mexican Day of the Dead Skull' post and the 'How to Make Halloween Glasses' post for you to check out. Not only will reading these posts kill some of your time, it will also provide handy tips that you may need for the frightfully fun day!

.Create small gifts- If you're having a Halloween party at your house or you're going to one, it may be a good idea to put together small gifts for guests in the time you have during the day. Why not make bookmarks, mini purses, monster models (from the Create a monster section earlier), small accessories or something else that you can adapt to be Halloween themed. If you aren't that creative, you could always go on a mini shopping trip to put together bags of small treats!


.Decorate-This might not be a job for you but if you're allowed to, you can decorate the house before anyone arrives! This is such a fun thing to do and can get you really excited for the festivities! If you can't decorate the whole house on behalf of your family, you could just decorate you own room! My ideas for decorating are:
-Put up your own spooky drawings on the wall to show off your artistic skills
-Use a large black bin bag as a creepy tablecloth for your snack table
-Put fake spiders (with their webs) in the corners of the room
-Swap your ordinary lightbulbs for coloured ones to add a creepy feel to a party room
-Cut eyes into empty loo rolls and in the evening, put glowsticks in them. Hide these in nearby bushes to scare passers-by!

-Put colourful sequins on the table to add a splash of colour
-Find hanging decorations in specialist stores and hang them around the room
-Place candles (skull shaped ones of Autumn scented ones) on empty surfaces
There are so many decorating ideas that you can find online, those are just the ones I use! Don't forget to decorate the front door to let Trick-or-Treaters know you've got treats for them!

That's it for my ideas on how to stay entertained on the day of Halloween this year! I hope you've enjoyed my tips and found my recommendations helpful! Have a great Halloween! Here's a question for you to answer in the comments: what are you dressing up as for Halloween this year? I'm dressing up as a creepy broken doll! Remember to check out my Halloween costume ideas post from last year if you still don't know or my new 'Halloween Costume Ideas 2015' post with guides on how to wear the costumes too! :)

PS: Have you seen my new blog template? I've chosen a new Autumnal background and colour scheme! I may change my template along with the seasons! Pineapples were for Summer, leaves are for Autumn and then there'll be templates for Winter and Spring later on! Tell me what you think of the new look!

PPS: Please vote in the poll, that is going on at the moment, on the right side of my blog screen! It ends very soon!

27 October 2015

Halloween Costume Ideas 2015

If you haven't already decided on a costume for Halloween (either because you have no clue or because you like to go last minute), then I've got your back! Today I'll be giving you some slightly creepy costume ideas which can be put together with some of the items you have at home and some cheap props from a quick shopping trip! This post is a mixture of my ideas from last year (but with extra tips on how to wear it) and some new ideas.

.Coraline- a blue wig, yellow coat, red top, jeans and wellies are all you need to be Coraline for Halloween! You can get cheap wigs from pound stores at this time of year or you can purchase a blue coloured hairspray to go on your own hair! You'll probably already have a red top, jeans and wellies (they don't HAVE to be yellow, people will still get the idea). Hopefully you'll have a yellow coat like Coraline, but if you don't you could either buy one or just wear a yellow jumper/cardigan instead! Why not get your Mum or friend to dress up as the Other Mother or a different character from the film too?

.Broken Doll-This year I'm dressing up as a broken doll! What's great about this costume is that  can easily be changed and look just as good even if you don't have all of the clothes/makeup listed! For the outfit you should have any dress, preferably one that reminds you of strange dolls (perhaps a floaty of frilly one). For the hair you can either do 2 plaits or ringlets (for an obvious look) or slightly messy hair that you leave down (for an easy hairstyle). For the makeup, either use pale foundation or face paint to look like a porcelain doll then use pink blush and lipgloss to add a girly look. Apply lots of mascara/fake eyelashes and use white eyeliner on the bottom of your eye to make the appear bigger. At this stage, if you really want to look scary, you can put red eye shadow under your eyes and then use drops of fake blood over it, to make the doll look like it is crying blood (this stage is not necessary, it just depends on the look you are going for). The main stage for makeup is to draw a crack on the cheek so that people know you are a BROKEN porcelain doll. You can do this using black eyeliner and filling it in with black face paint. Remember you can miss out some stages and add in your won ideas depending on how much time/materials you have. To top of the look draw some joints on your shoulders, neck and knees with eyeliner and make it look realistic with brown eye shadow to create shadows!


.Zombie-To create a last minute zombie look first start by putting cuts in old or cheap clothes that you won't want to wear again. You can also put fake blood on these clothes if you have it (remember to choose the right one for fabrics). For the makeup use pale foundation/facepaint, like in the broken doll costume, and contour your cheek bones with green/brown toned eye shadows. You should also use the same makeup to create large dark circles under the eyes for the undead look. You can also put fake blood around the mouth (use a different one than the one you used on your clothes) for a gruesome feel. Remember to make your hair messy and don't do any special hairstyles, you could backcomb it instead!

.Sugar skull- To be a Mexican sugar skull, you'll need lots of face paint, you can buy this from pound shops or costume shops for small prices! Look up designs online for inspiration however, sugar skull designs are all unique so there isn't one way to do it. But typically, there are flower petal designs around the eyes and teeth lines on the mouth along with swirly patterns on other areas of the face. The outfits can really be anything, a great accessory for he outfit is a flower crown (preferably ones with marigolds on them, but you don't have to). I was a sugar skull last year and it was very fun, however isn't as scary as other costumes, which is good if you don't enjoy horrific outfits. This look is very trendy too!

.The Joker- All you need for the Joker costume is face paint/makeup, a green wig/hairspray, and purple and green clothes! The joker may be a male character, but you can still dress up as him if you are a girl! This twisted villain is a great costume for Halloween that shouldn't take you too long to put together! For the makeup you should use white paint or extremely pale foundation for the base colour (you don't need to put it on the neck, just the face) then black face paint or black eyeliner and eye shadow for around the eyes and creases in the forehead. For the lips you can either use red face paint or lipstick depending on what is available to go on the lips and to be smeared along the cheeks. The real joker wears a green and purple suit, but if you don't have this already (mos people won't) then you can just wear any purple and green clothes (such as a purple dress/top and green leggings). To top off the look wear a green wig or spray your own hair green.

I hope I've helped you decide on what you'll be wearing this year (or given you inspiration for next year). Still need ideas? Check out this post then with some extra ideas,! Let me know what you're dressing up as for Halloween this year in the comments below! I'd love to here what you're going to be and how you're creating the look! It may help other people to decide on theirs! Have a great Halloween!

PS: I've dressed up as all of these costumes from the post (apart from Coraline who I'm planning on dressing up as next year, or perhaps the other mother instead).

PPS: I hope you like the new look of my blog! Also, please vote in the poll that is going on at the moment! I'vce already done several seasonal posts because people requested it!

24 October 2015

How To Create Zentangle Inspired Art


 Today I'll be showing you how to create zentangle inspired art. I call it zentangle inspired art because it isn't an actual zentangle but it includes similar elements such as intricate patterns (but only here and there). The drawing style zentangle was originally created as a meditating method to relax you. It's true that drawing detailed pictures can calm you down, however I do zentangles because I love the overall affect of this technique. In this post I'll be showing you my practice exercises that I do before starting this type of art. I hope I help!


To start off, I drew elements that I wanted to include in my drawing. This can really help because you can get used to drawing things you have never drawn before (this was my first time drawing bats, as you can tell :P). Also, this is your chance to adapt your drawing style. This really is the time to experiment! I had fun creating spooky faces on the pumpkins, skulls and ghosts! You can try different shapes and sizes to create a new look! My top tip is to put ticks and crosses next to your doodles. This doesn't necessarily mean you will include them in your final piece, it just says to you whether you like the way it looks or not. In one way, this practice page helped me to decide what I was actually able to draw in my last piece because I then knew that I didn't want to include ghosts as I couldn't get it right.


The next stage of the drawing process was another practice page, this time it didn't go into so much detail. It just had a few practices of each technique until I got them right. To create this practice page template, I just drew a few small boxes. From then on, I started drawing Halloween patterns in them and decided whether they were good or bad. To fill the space I did a quick practice of the main drawing, a little witch. I did a colour test on the doodle to see what worked best together.


It was then time to start the real thing! I kept looking back at my practice pages that proved to be very helpful! I used the elements from the first exercise to fill the spaces at either side and the pattern page to fill the little witch. There were some extra doodles on here that I didn't practice. If you are having trouble coming up with new ideas for your drawing, you can search keywords on google images such as Autumn, Halloween or spooky. Remember! You should only be inspired by other artist's work rather than copy them; you want to create a unique piece that you can be proud of! Now you can either leave your zentangle inspired art black and white (this is traditional) or you can continue onto the next stage like I did...


The final (optional) step is to add colour! This is where the colour test comes in. I looked back at my colour test and made a new colour scheme with different shades that I thought worked well together. This is a Halloween picture so I tried to include , orange, black, green, purple and metallic colours to give a spooky feel to the drawing. I made a gradient of dark purple to pale blue for the early evening sky. I scattered hundreds of little silver stars over the sky to make it look magical. I love the overall effect of this picture; I poured hours of my time into it and I feel it's worth it! I hope this has helped you to gain new skills and think about practicing in a different way. Let me know in the comments what you have created with my tips and what other drawing posts you would like to see on this blog!

PS: Don't forget to vote in my poll to tell me what type of post you want to see soon! If you voted for a seasonal post, (as well as this one) you'll see plenty in the next few weeks!

21 October 2015

Back to the Future vs Reality

Today is the FUTURE! Well, according to the film Back to the Future 2. So be excited, by the end of today we should be seeing hover boards, flying cars and self-tying shoelaces everywhere. As a bit of fun I decided to draw a fashion design based around the fashions of this year that the movie predicted and the actual fashions of the year. I took about 2 hours on this design so I thought I would share it with you! 
    To see the labels then click on the picture and it will zoom in. I compared the 2 outfits by describing each element. I used one of the TopModel template books to start me off but I drew everything from clothes to hair. I don't often label designs but for this particular project, I thought it benefited the drawings.
The future may not be as the film intended, but I hope you have a great day anyway! Why don't you watch the Back to the Future films (there is 3) as a celebration? I know this was just a short post but I just wanted to make you aware of the special day and share my design with you! Tell me in the comments what your predictions for the future are-I'll enjoy seeing what you think! :D

11 October 2015

Read With Your Cuppa' #4

Youtuber to watch


SoCrafttastic (AKA Sarah) is a great youtuber for people who love crafting! I know many of my readers are creative people so this is why I recommend her channel. Her videos vary from crafting, drawing, fashion and more! I particularly like her polymer clay tutorials and zentangle videos. I feel like she covers all sorts of projects so many people will enjoy them and learn something new!


Fun Activity
  There's something about baking seasonal treats that feels so fulfilling. I'm enjoying baking gooey cookies (with flavours like cinnamon or chocolate) and crumbles (my fave is rhubarb but I've been making several apple and blackcurrant ones recently). There are so many yummy recipes to try and as Autumn/Winter 2015 takes place, I love to make festive bakes. Check out all my food related posts for new ideas!


Fashion Trend


70s inspired outfits are fashionable right now! This isn't to say you have to go all out wearing vibrant colours and disco outfits, this means you should consider adding subtle touches of the 70s in your outfits to achieve a take on the popular boho look. Think bold prints, loosely flared trousers and rounded glasses as well as other pieces that pull the look together.


Inspirational Quote


Today's inspirational quote is about not giving up. You should always have a positive mindset when taking up a challenge. You learn new things along the way which help you to achieve. If you go through life thinking that big tasks are impossible you'll be missing out, big time. There's so much to discover so go out there and try your very best.


Meal To Try

Pesto pasta bake with chicken and bacon is one of my favourite meals! You can easily adapt this to be veggie by swapping the meat for peppers or other veg, it's still delicious! The simple recipe is this:
1. boil the pasta whilst you fry the chunks of meat
2. drain the pasta
3. mix the meat and pasta together in a dish with pesto
4. cover with grated cheese and mix again
5. grill the pasta bake
You can find more detailed recipes online but that's the basic method! I sometimes add yellow peppers for depth, but I love it either way!


06 September 2015

B2S DIY Notebook

Hi guys! Some of you may have already gone back to school but there's still time to make your notebook cute! Today I'll be showing you how to make a collage notebook! On the right you can see my DIY collage notebook! Cute right? The best thing about this tutorial is that it can be completely different to mine! Here's the simple tutorial:
1.) Find a plain, cheap notebook that you will be decorating!
2.) Choose a cute piece of paper that can fit your notebook!
3.) Cut it to size. You can either have just the front covered or both the front and back covered! It's up to you!
4.) Stick the paper down
5.) Look for images online of your favourite things or just search for pretty things!
6.) Put them all on a word document and print them off!
7.) Cut them out carefully and arrange them on the notebook.
8.) One by one, glue them to the front cover.
9.) Fill the empty space with things like washi tape, sequins, glitter, buttons ect.
10.) Enjoy your unique notebook!


That's just the start of creating your own notebook! You can see in the pictures above that I have done some cool things inside the book as well! On the left there is a picture of the first page. On the first page of the notebook, I stuck lots of motivational quotes that I can look at whenever I want to! I got all of these quotes off of google images and printed them off! On the right, I have another page in my notebook! I have decided that on every page there will be an activity on the left and a notes page on the right! In this particular picture I have chosen to put a mini 'adult colouring book' page on it. On every notes page I have chosen a cute sticker to decorate it with! 

You don't have to do this with your notebook! Here are some more ideas for the inside of your notebook:
.write your timetable inside it
.write down your homework and when you have to give it in
.use it as a sketchbook/doodle book (you can't doodle in your exercise books)
.write down story ideas (if you're a writer)
.write down blog post ideas (if you're a blogger)
.write down lyrics to songs (if you need to learn a song)
.write down a script (if you're in a play)
.write down music notes (if you're a...you get the point)
.write translation pages for the language you're learning

There's so much you can do with your DIY notebook! I hope you try out this simple tutorial!

PS: Don't forget to check out my giveaway that's going on at the moment by clicking here!

01 September 2015

My Terrific Ten Art Tips-Guest Post with 5 Star Artists

Hiya! I’m Kenza, author of 5 Star Writers and 5 Star Artists, an enthusiastic writer and artist who enjoys… you got it, writing and drawing! XD Today I’m hosting a guest post collab with Megan, which we’ve been really excited to share with you guys and hope you’ll enjoy!! :D For my part of the collab, I have decided to share ‘My Terrific Ten Art Tips’ . This is my first detailed art tutorial, put together especially for this collaboration, so I’ve done my best to choose art tips that would help all those artists out there willing to draw something awesome!

Be sure to check out Megan’s post, ‘What’s In My Sketchbook’ which is now featured on my art blog! You are guaranteed to like it!

If you’re interested in this post, please do check out my art blog, 5 Star Artists for more. I always do my best to share things that’ll interest my watchers. :)

Enjoy! :3

1) Start with the Eyes: When drawing characters (animated character fanart especially), I recommend you start drawing the eyes before anything else. (However, don’t of course go into detail until you’ve drawn everything else.) Not only does it help get the proportions right, it also helps you draw the eye in a more accurate way. Moreover, eyes are known to be what define a character’s appearance.

2) Play Music: This isn’t absolutely necessary, but I find that music makes drawing feel less time-consuming. When I draw, I’ll find a track that best fits the thing I’m drawing, say Let It Go when I’m drawing Elsa, Zen Ball Master when I’m drawing Po, I Can’t Wait To Be King when I’m drawing Simba, etc. … it doesn’t even have to have lyrics. Another interesting thing is that lots of artists out there are inspired by music to draw something. It’s cool!

3) Practise Drawing Hands: Hands are known to be one of the most complicated body parts to draw, according to most artists. They have a random form that is hard to copy. The best you can do is practise drawing them. Every so often, when I have the time, I’ll think, okay, I’m going to draw some hands again. I’ll get my spare art book (I totally recommend getting a spare one – it doesn’t even have to be heavyweight) and I’ll sketch some different hand shapes, either hands of animated characters (this is a good way to start) or of real hands. Try Elsa (Frozen) if you can – her hands always make interesting shapes and the good thing about it is that it gets you practising the easy way.

4) Draw Hairstyles: I personally find drawing hairstyles one of the most fun parts of drawing a character. Why? Because you can get really crazy and creative with them. I would also recommend practising them. When drawing hair, be sure to start at the parting. It helps a lot. Furthermore, if you draw a manga character, be sure to draw a hair line. This helps get the hair in an accurate position.

5) Use References: Almost all artists use references when they draw. References are there for everything… to inspire, to get things accurate, to help you develop your own style, and so on. Honestly, I don’t recall doing any good art pieces without using a reference. Bear in mind, there’s no restriction to how many references you can use. The more you use, the better!

6) Try Different Ranges Of Pencils: Okay, so this really does help when you draw, believe me. There are lots of artists out there who just use an HB pencil (I don’t blame you if you do, though, because of course a lot of people only have HBs as they’re also handy for writing. XD). You can get different ranges everywhere (good quality ones include Faber Castell, Royal & Langnickel and Derwent Academy). I recommend a set of 6B-5H if you can, but 3B-2H at least. Most people start their drawings with a 6B because it’s softer and easy to rub out. I, personally, then use a 2H (sometimes I even start with a 2H when doing fanart, haha) and a 5H for extra details. When you’re doing eyelashes, try a (sharpened!) 2B – it works better. Whatever you do, *SHARPEN YOUR PENCILS*. (Okay, I think I’d better stop my lecture on pencils now… XD)

7) Go Over In Ink Pens: I could go on forever about ink pens, but for now I tell you, not only do inks pens make your art stand out, they also preserve it for longer. If you don’t, you’ll soon find that the pencil lines smudge (Especially 6Bs. Most definitely.) When doing thin lines or eyes, I use a very fine tip, either an XS Calligraphy Pen or an ink pen of 0.05. When doing thicker lines, I use an S Calligraphy Pen or an ink pen of 0.1+.


8) Perfect Your Artwork: Once you’ve finished what you’re drawing, perfect it. Just try. Correct the proportions, add on more details, etc. Anything, anything at all that makes your picture look better. You’ll be glad you did it, because if you race ahead and colour, there’s a good chance you won’t be happy with the results in the end and it’ll be too late. Lesson learned (the easy way). (excuse the handwriting in this one)


9) Use A Manikin: If you’re drawing a person, and you aren’t copying something, then use a manikin. They help a ton, believe me. You can easily twist the wooden body parts into the shape you desire (jumping, sitting, waving, the splits, a pirouette, anything). Just copy it, draw the outfit on top and then rub out the manikin shapes. I know it sounds a bore, but it’s easier done than said! You can buy them in shops like The Works. I’ve got a small one and a big one (personally, I think the big one is better).


10) Compare Your Artwork: If you ask me, comparing artwork and looking back at your old pieces is an important thing for an artist. We all improve by learning from our mistakes and the only way to do that is facing our mistakes (even our worst fails). If you do fail an art piece, don’t rub it out. It’ll help you improve looking back at it in future. I don’t mean to be superior about my artwork, but I’ll admit I’ve improved a lot over the past year. (As for the old ones in this picture, I drew them over a year ago).

I also have some bonus tips to share with you guys!
1) Try reflecting your artwork (all you need to do is hold your artwork in front of a mirror and all the mistakes you haven’t noticed will show up – it’s a really cool life hack!)
2) Sharpen your pencils (yes, I’ve mentioned this in tip #6, but I just need to emphasise how much this helps when drawing)
3) Buy a heavyweight art book (they may be higher in price, but they’re absolutely, totally worth it… otherwise, get an art book over 139gsm… you see, if you don’t, it’s easy for pens/paints to sink through the paper or rip when you keep rubbing out – and we all know that’s totally annoying.)
4) Start with a rough sketch without pressing hard (otherwise, you might find later that you’ve made a mistake and can’t correct it easily)
5) Doodle (true fact: it gives you ideas and even helps you think, Zentangles especially)
6) Don’t be afraid to make mistakes (if you don’t make mistakes, then you won’t improve, so it’s perfectly fine if you do!)
7) And most importantly, KEEP PRACTISING! :D (whether you decide to follow any of these art tips or not, just keep practising… you want to draw a complicated mansion, a detailed dinosaur, a beautiful background? Just keep going at it and you’ll be a master of it in time to come.)

Thanks for reading! It’s been a pleasure to write for Megan’s blog and I hope you artists out there learned a thing or two from this! :D Keep drawing and keep your imagination racing!


Note from Me:

It was lots of fun writing with kenza and for her brilliant blog-so please check out 5 Star Artists to see what other amazing posts she has come up with! You can find my guest post 'What's in my Sketchbook' in her blog too! I hope you enjoyed this collab! Let me know in the comments what your favourite tip of hers was! Also, please check out the giveaway going on at the moment on my blog, by clicking here.